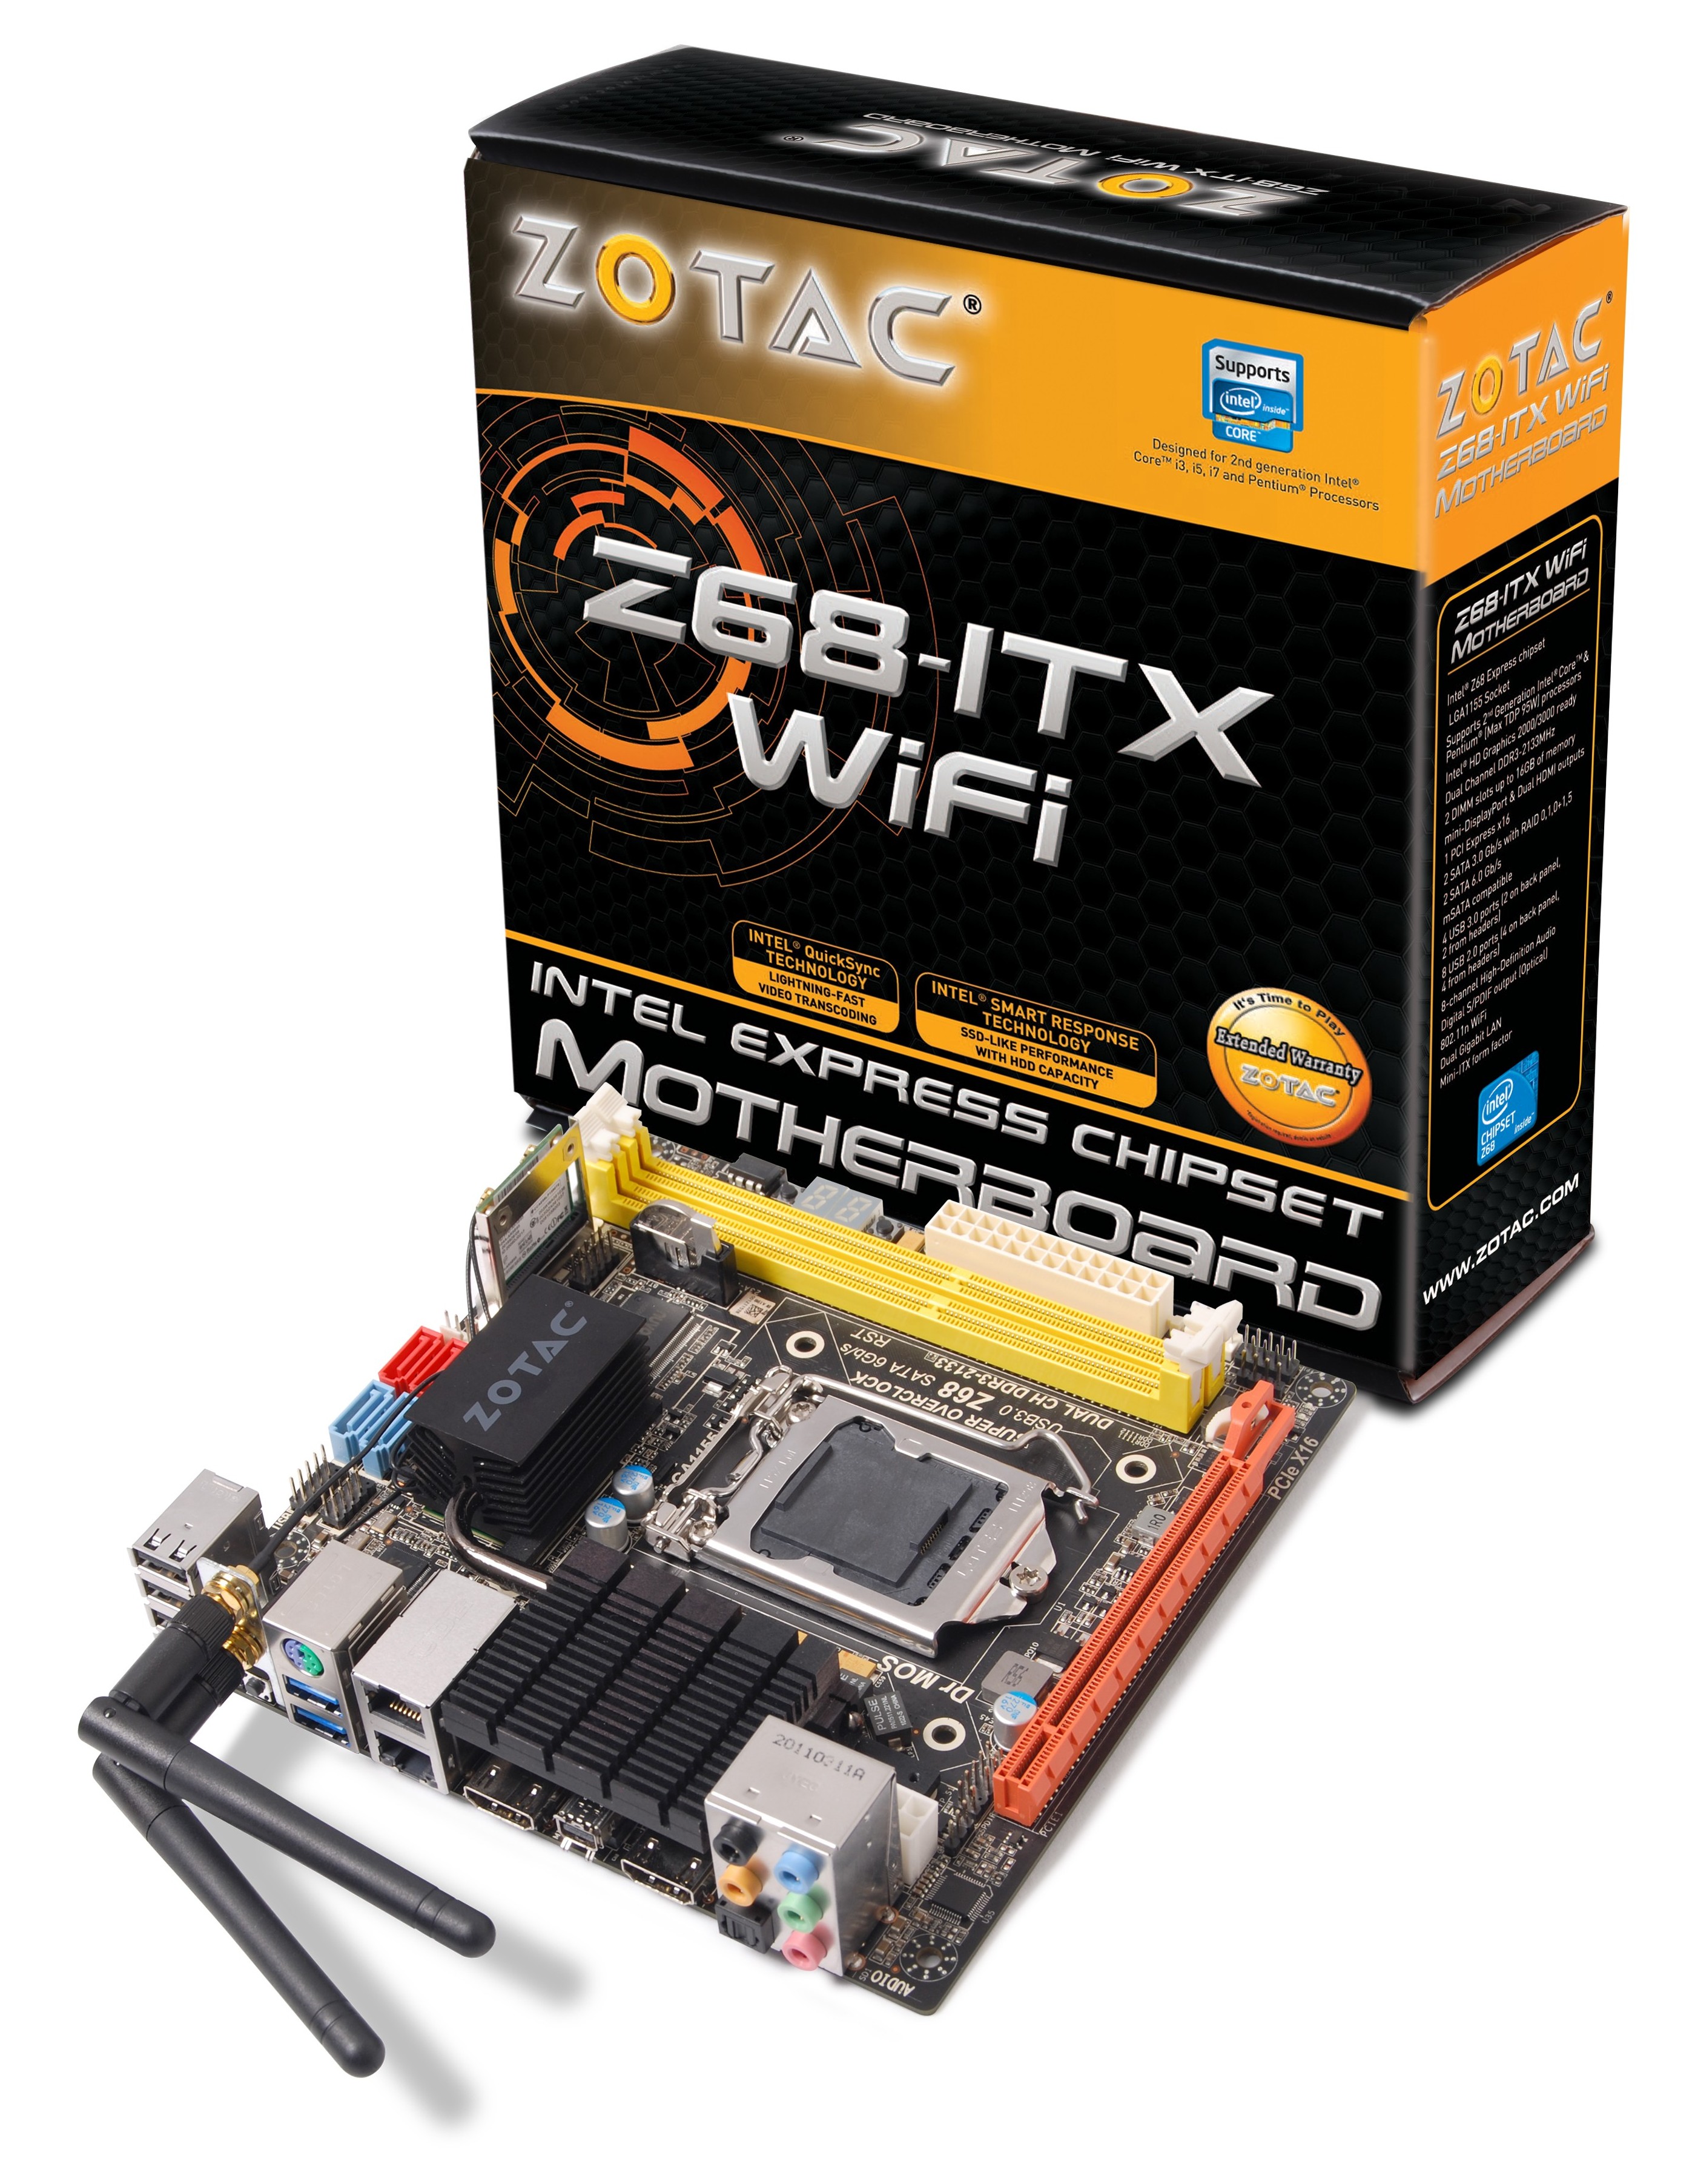
With every chipset, there's a call to arms in providing the package that everyone needs. Unfortunately there's never one motherboard which can cater for every possibility, but there are some that come quite close. Our review today is on the Zotac Z68ITX-A-E Wifi - a mini-ITX take on the Z68 chipset, which promises to be a winner right from the start, with dual gigabit Ethernet, USB 3.0, onboard wifi, onboard power/reset buttons, a debug LED, a lot of extras with your motherboard, and all the extras that Z68 offers. For $170, we're looking at a good contender for an award here, as long as the performance and additions compare well to its rivals.

Overview
The most noticeable thing about using the Zotac board for this review is the out-of-spec features used by Zotac. With regards to the turbo of the CPU, the CPU should scale down the multiplier bins the more cores being used - however, the Zotac board likes to apply a 4x multiplier increase, even in full CPU usage. This gives it a distinct advantage in all our stock benchmark suite, and an unfair advantage against every other board in the market. It gives the consumer, however, extra performance without having to do anything. This may set an unhealthy trend, where other manufacturers will similarly produce products out-of-spec in order to jump ahead in performance.
Overall, for $170, Zotac have provided a board full of features that provide a great motherboard for various consumer levels. The addition of dual gigabit Ethernet, onboard wifi, dual HDMI, and that out-of-spec CPU speed are nice additions to such a small product. This situation benefits a non-K Sandy Bridge CPU (which unfortunately negates one of the Z68 features, overclocking, which as we find out isn't that great on the Zotac) where the iGPU is required as well as the PCIe x16 slot. There's not too many SATA ports (two SATA 6 Gbps, two SATA 3 Gbps), which perhaps is ideal for the non-enthusiast consumer (SSD, HDD, DVD/BluRay drive). Also, the lack of overclocking may be a sticking issue for some. I'm unsure if I should label it a gamers' board, a 24/7 machine with various enthusiast applications that require performance, or a multi-monitor setup that needs Sandy Bridge and Z68 and perhaps a GPU for GPU programming. Nevertheless, I've found the board an impressive product at a great price, despite the old fashioned BIOS and lack of software provided.
Visual Inspection
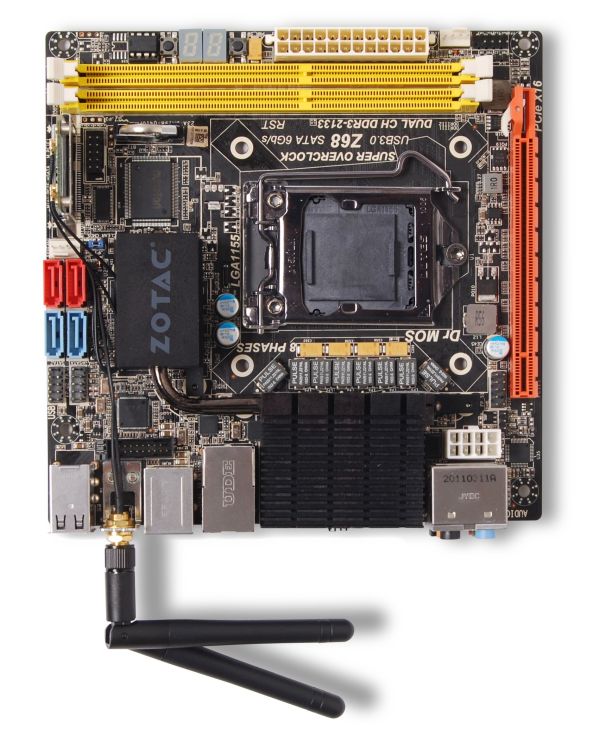
With Zotac's aim of piling as much as it can onto such a small PCB, it is obvious to see that the board is fairly cramped, in a livery with no defined color (yellow, orange, red, blue, black). As a result, the 8-pin 12V CPU power connector is on the far end of the board behind the audio headers of the I/O panel. The CPU socket is also quite small in comparison to full size P67/Z68 boards we've seen this year, negating large CPU coolers but still providing enough space for stock coolers and all-in-one CPU coolers such as the Corsair H50 and H100.
There are two fan headers on board - one by the SATA ports and the other beside the 24-pin ATX power connector. Beside this power connector are the power/reset buttons and a debug LED - it's great to have this on such a small board. The wifi module is in a mini-PCIe (with mSATA compatibility) between the memory slots and the SATA ports - with cables from the wifi card to the I/O panel. A full size mSATA holder is included in the bundle, if the user decides not to use the wifi and takes advantage of the Z68 Smart Caching Technology via this port.
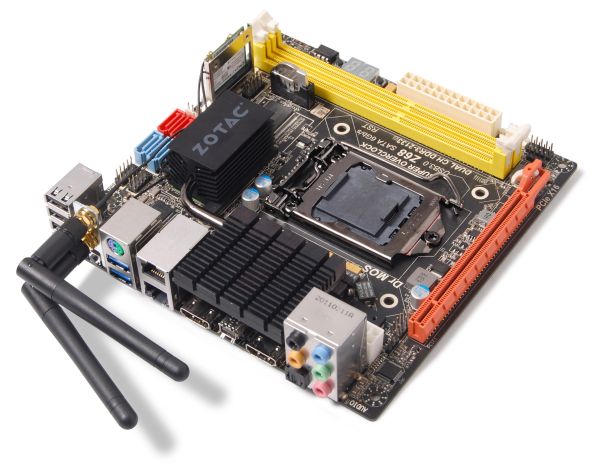
On board are four SATA ports - two SATA 6 Gbps and two SATA 3 Gbps, all from the PCH. Technically the PCH should be able to support two more, but given the size of the board and all the other extras on it, it's understandable that these are not included. Beside the SATA ports are two USB 2.0 headers, and beside them, behind the wifi antenna, is a USB 3.0 header.
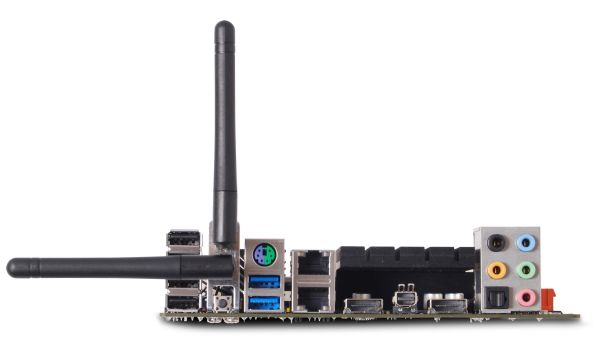
The back panel of the board is also similarly cramped, with a combination of wifi antenna, dual gigabit Ethernet, two USB 3.0, four USB 2.0, a clear CMOS button, a PS/2 Connector, dual HDMI and mini-DisplayPort, optical SPDIF output, and the standard audio jacks. The combination of having the heatsink there results in some space lost - perhaps if it wasn't there by design, the HDMI and mini-DP could be stacked and other features could be added.
Overview
The most noticeable thing about using the Zotac board for this review is the out-of-spec features used by Zotac. With regards to the turbo of the CPU, the CPU should scale down the multiplier bins the more cores being used - however, the Zotac board likes to apply a 4x multiplier increase, even in full CPU usage. This gives it a distinct advantage in all our stock benchmark suite, and an unfair advantage against every other board in the market. It gives the consumer, however, extra performance without having to do anything. This may set an unhealthy trend, where other manufacturers will similarly produce products out-of-spec in order to jump ahead in performance.
Overall, for $170, Zotac have provided a board full of features that provide a great motherboard for various consumer levels. The addition of dual gigabit Ethernet, onboard wifi, dual HDMI, and that out-of-spec CPU speed are nice additions to such a small product. This situation benefits a non-K Sandy Bridge CPU (which unfortunately negates one of the Z68 features, overclocking, which as we find out isn't that great on the Zotac) where the iGPU is required as well as the PCIe x16 slot. There's not too many SATA ports (two SATA 6 Gbps, two SATA 3 Gbps), which perhaps is ideal for the non-enthusiast consumer (SSD, HDD, DVD/BluRay drive). Also, the lack of overclocking may be a sticking issue for some. I'm unsure if I should label it a gamers' board, a 24/7 machine with various enthusiast applications that require performance, or a multi-monitor setup that needs Sandy Bridge and Z68 and perhaps a GPU for GPU programming. Nevertheless, I've found the board an impressive product at a great price, despite the old fashioned BIOS and lack of software provided.
Visual Inspection

With Zotac's aim of piling as much as it can onto such a small PCB, it is obvious to see that the board is fairly cramped, in a livery with no defined color (yellow, orange, red, blue, black). As a result, the 8-pin 12V CPU power connector is on the far end of the board behind the audio headers of the I/O panel. The CPU socket is also quite small in comparison to full size P67/Z68 boards we've seen this year, negating large CPU coolers but still providing enough space for stock coolers and all-in-one CPU coolers such as the Corsair H50 and H100.
There are two fan headers on board - one by the SATA ports and the other beside the 24-pin ATX power connector. Beside this power connector are the power/reset buttons and a debug LED - it's great to have this on such a small board. The wifi module is in a mini-PCIe (with mSATA compatibility) between the memory slots and the SATA ports - with cables from the wifi card to the I/O panel. A full size mSATA holder is included in the bundle, if the user decides not to use the wifi and takes advantage of the Z68 Smart Caching Technology via this port.

On board are four SATA ports - two SATA 6 Gbps and two SATA 3 Gbps, all from the PCH. Technically the PCH should be able to support two more, but given the size of the board and all the other extras on it, it's understandable that these are not included. Beside the SATA ports are two USB 2.0 headers, and beside them, behind the wifi antenna, is a USB 3.0 header.
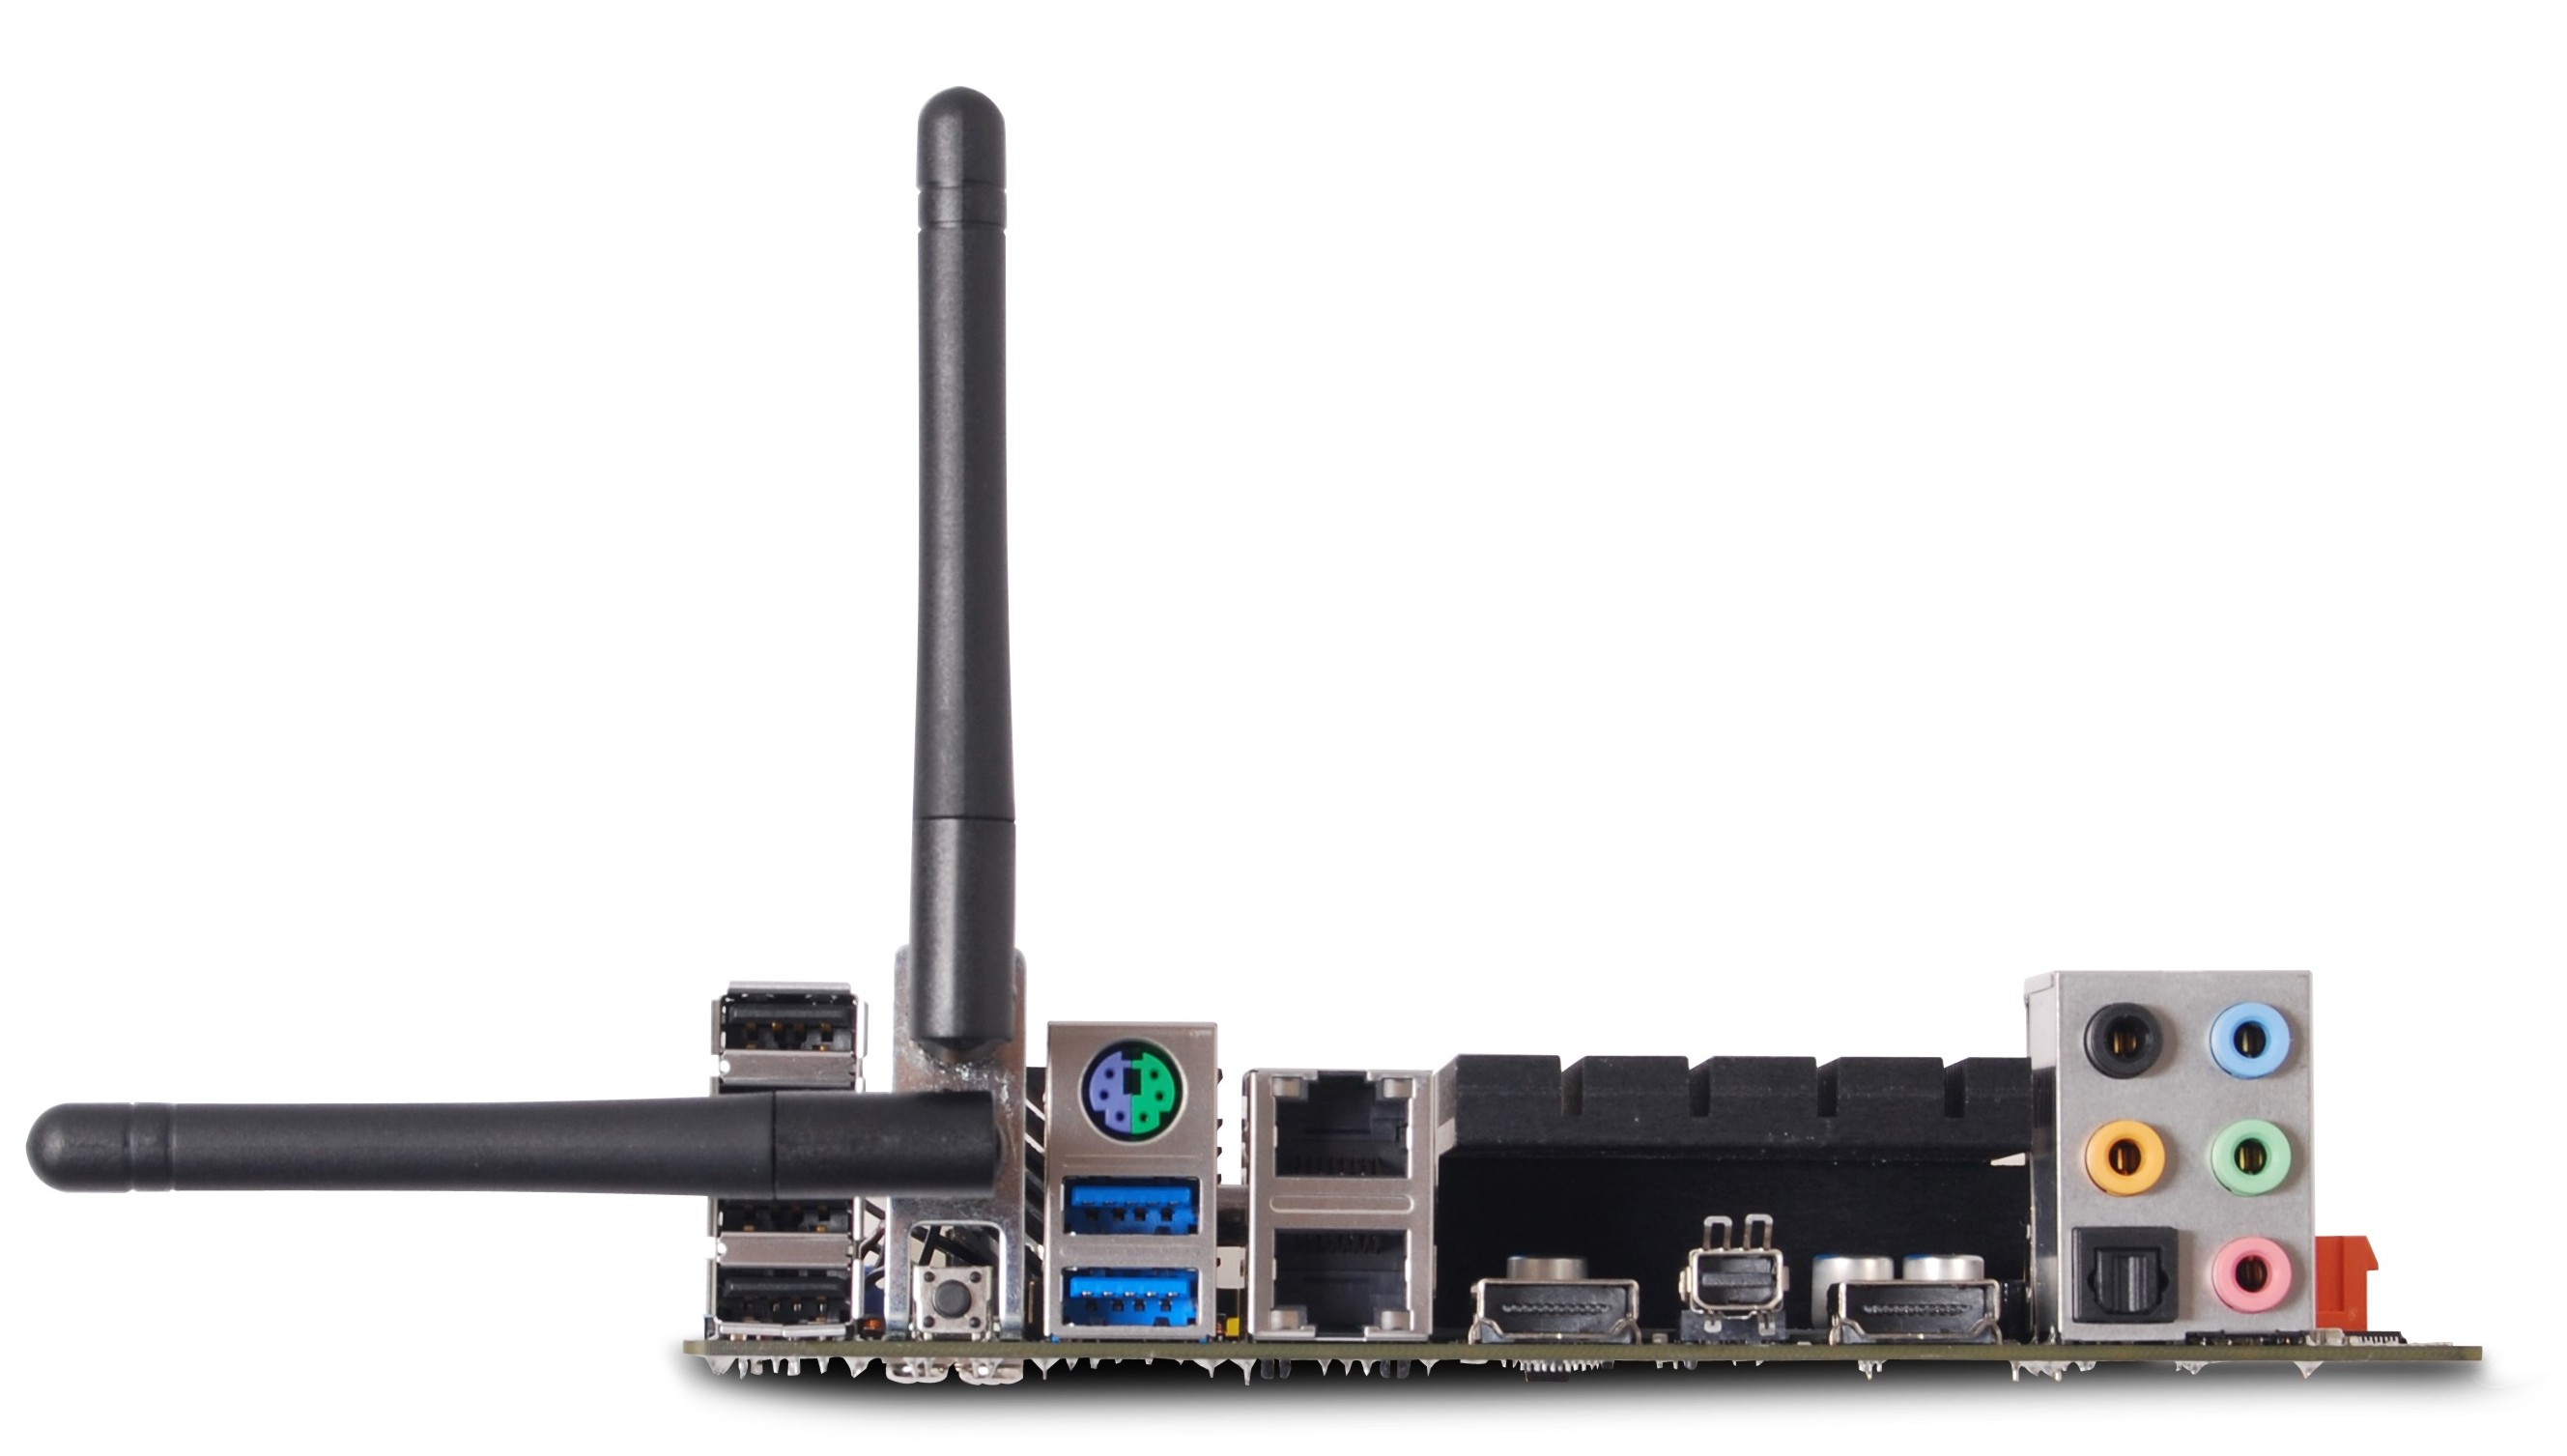
The back panel of the board is also similarly cramped, with a combination of wifi antenna, dual gigabit Ethernet, two USB 3.0, four USB 2.0, a clear CMOS button, a PS/2 Connector, dual HDMI and mini-DisplayPort, optical SPDIF output, and the standard audio jacks. The combination of having the heatsink there results in some space lost - perhaps if it wasn't there by design, the HDMI and mini-DP could be stacked and other features could be added.