This is default featured slide 1 title

Go to Blogger edit html and find these sentences.Now replace these sentences with your own descriptions..

This is default featured slide 2 title

Go to Blogger edit html and find these sentences.Now replace these sentences with your own descriptions..

This is default featured slide 3 title

Go to Blogger edit html and find these sentences.Now replace these sentences with your own descriptions..

This is default featured slide 4 title

Go to Blogger edit html and find these sentences.Now replace these sentences with your own descriptions..

This is default featured slide 5 title

Go to Blogger edit html and find these sentences.Now replace these sentences with your own descriptions..

Friday, November 18, 2011

Introducing Dell Inspiron One 2320 Specifications

Our last Windows all-in-one review was for HP's TouchSmart 610, an interesting if slightly pricey piece of desktop kit. HP brought a lot of innovation to the table but they couldn't quite patch over the underlying problems with the hardware and software ecosystems that keep a touch-based all-in-one from really achieving all it can. Today we have on hand the Dell Inspiron One 2320, complete with Dell's own touch-based software interface and its own bells and whistles. Is Dell able to smooth over those issues better than HP could, or did they stumble on to some new ones?


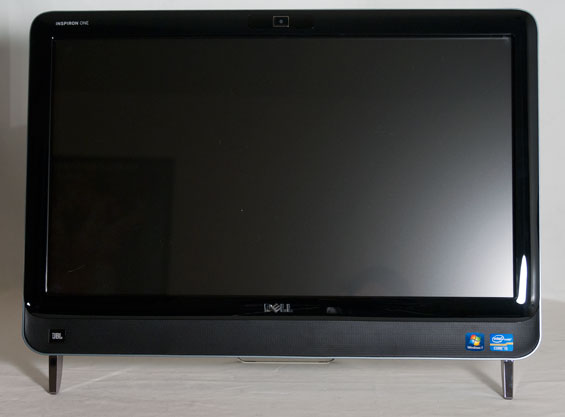
What surprised me out of the gate was that Dell opted to go for a much less adjustable stand than any of HP's or even Toshiba's all-in-ones (one of which we have in house); the Inspiron One 2320 has two legs and then it just sort of reclines on its own. That makes it simultaneously more and less user-friendly than the competition; there's something about it that feels more approachable, but at the same time it's really less adjustable than the other ones, and with a TN panel that really spells trouble. Let's hit the specs before we go any further.


Dell Inspiron One 2320 Specifications
Processor Intel Core i5-2400S
(4x2.5GHz, 3.3GHz Turbo, 32nm, 6MB L3, 65W)
Chipset Intel H61
Memory 2x4GB Hynix DDR3-1333 SODIMM (Max 2x4GB)
Graphics NVIDIA GeForce GT 525M 1GB DDR3
(96 CUDA cores, 600/1.2GHz/1.8GHz core/shader/memory clocks, 128-bit memory bus)
Display 23" LED Glossy 16:9 1080p
Hard Drive(s) Seagate Barracuda XT 2TB 7200-RPM SATA 6Gbps HDD
Optical Drive Blu-ray reader/DVD+/-RW writer (HL-DT-ST CT30N)
Networking Realtek PCIe Gigabit Ethernet
Intel Centrino Advanced-N 6230 802.11a/b/g/n
Bluetooth 3.0
Audio Realtek ALC269 HD Audio
Stereo speakers
Headphone and mic jacks
Front Side Webcam
Speaker grilles
Right Side Optical drive
Input button
Power button
Left Side Brightness control
Volume control
Headphone and mic jacks
2x USB 2.0
SD/MMC/XD/MS Pro card reader
Back Side Kensington lock
HDMI input
Composite input
Optical out
Antenna jack
Antenna jack for NTSC/OTA ATSC input
VGA output
Ethernet jack
Surround jack
4x USB 2.0 (one taken by wireless mouse and keyboard receiver)
Operating System Windows 7 Home Premium 64-bit
Dimensions 22.25" x 2.5" x 17" (WxDxH)
Weight 18.85 lbs
Extras Webcam
Wireless keyboard and mouse
Flash reader (MMC, SD/Mini SD, MS/Duo/Pro/Pro Duo)
Blu-ray writer
Touchscreen
JBL speakers
Warranty 1-year basic support
(optional 3-year)
Pricing Starting at $599
Price as configured: $1,249

As with HP's TouchSmart 610, Dell's Inspiron One opts for a mix of desktop and notebook hardware. The CPU is a low-power desktop model, the Intel Core i5-2400S clocked at 2.5GHz and capable of turbo-ing up to 3.3GHz on a single core or 2.6GHz on all four non-Hyper-Threaded cores. Instead of desktop DIMMs, though, Dell only offers two SO-DIMM slots, each with 4GB of DDR3, more than adequate for even demanding use cases.

The graphics hardware takes the hit, though. I ranted a bit about the lack of a proper ecosystem in my HP TouchSmart 610 review, but here it's particularly egregious. Dell opts for a lowly NVIDIA GeForce GT 525M as the fastest GPU you can get in the Inspiron One 2320 line. The desktop GeForce GT 430 it's descended from was already pretty dire to begin with, but just 96 CUDA cores running at 600MHz (1.2GHz on the shaders) and just 1.8GHz of DDR3 on a 128-bit memory bus isn't going to cut it for a 1080p display. We've tested this chip on Dell's XPS 15z as well, and really it's only good for medium detail 7680p gaming. This is the same issue I had with HP's all-in-one, only here it's amplified because there had to have been thermal headroom in the Inspiron One 2320 for at least the GeForce GT 540M. I'd complain about that, too, but not quite so vocally.

When I spoke to HP's representative about the meager graphics hardware in the TouchSmart, she suggested that it was really meant to be more of a family computer and thus didn't need particularly aggressive graphics hardware. That may be the case, but it undermines the necessity of a dedicated GPU to begin with. If the integrated HD 2000/3000 graphics are inadequate, you probably plan on doing at least some gaming, so you'll want more. The fact is that these mobile graphics chips were designed for notebooks with 768p screens, and at that resolution they're fine. On an all-in-one, though, they're much harder to justify and really speak to a fundamental problem with the all-in-one ecosystem: we need an in-between point for graphics hardware. What we really need for "upscale" 1080p AIO systems is at least GT 555M or (preferably) GTX 560M level hardware; we've seen such chips in 14" and 15" notebooks; would it really be that hard to stuff something faster into a significantly larger AIO system? The GT 525M upgrade from the base model Inspiron One 2320 ends up costing over $200, and for that price it just doesn't add enough performance.

The rest of the Inspiron One 2320 is capable enough, and Dell seems to be gunning for more of a true family machine with it by including VGA, composite, and HDMI inputs, suggesting that even when the computer inside it isn't particularly great anymore, you can still use it as a monitor. It also supports Intel's WiDi, and the hard drive inside is a full 3.5" drive.

Intel Manufactured Board Siler DX79SI Review as X79

Reviews of Intel manufactured boards are something of a rarity.  They are not marketed in the same way other motherboards are – almost not at all in comparison.  It could be argued that reviews are only seen coming at the start of a chipset release, coinciding with what we as reviewers get in our media kits from Intel itself.  However, to an enthusiast, it is strange to say that they sell well – consumers or system builders wanting to pair a processor with a board without hassle can go straight in at an Intel motherboard/processor combo. 


The question is with an enthusiast platform such as X79, would you really want to deal with an Intel board?
Internally, I have to question how big Intel’s consumer motherboard design team is.  We know their processor and chipset design groups must be comparatively huge to pump out all the products we see on our shelves.  But to produce only one or two consumer motherboards with each chipset, it comes into question whether an Intel board would contain all the features, updates (cf. BIOS later), performance and competitiveness when compared to products from third party vendors, for which motherboards are their main business.  Our last reviews of P55 and H57 show that Intel usually plays it safe – having a working product on their end is more important than bells and whistles.  However in a market where a ‘working product’ should be the de facto standard, Intel invariably has tough competition.

Overview

The DX79SI ‘Siler’ motherboard from Intel is a hard one to summarize.  If I were being lazy, I could merely say ‘it works’, however there is more to that than meets the eye.  In some areas, it gives more than standard – e.g. dual gigabit Ethernet.  But with one hand it gives and the other it takes away, with no option for teaming.
Users of Intel boards of past will notice the continuing ‘skull’ theme in a blue/black miasma of components and connectors, which unlike previous iterations do not light up.  The board sports the bare minimum from the SATA connectors, as well as a lack of thought to the PCIe layout for anyone using more than one GPU.  The PCIe are only rated for Gen 2, which isn’t surprising – other vendors sporting Gen 3 compatibility are outside X79 specifications for now.

The BIOS itself is simple and functional; however do not expect anything spectacular.  While ASUS, Gigabyte, MSI and the test have teams of designers for graphical interfaces, Intel does get left behind in its application of a basic system still.  It is not always clear what is a menu and what is not, however one thing I do like is that the text turns yellow when you change it, making it easy to see what default is.  This makes looking at the Auto OC options a lot easier.  The ‘Back2BIOS’ switch on the IO panel is a feature I hope other vendors adopt as well.

Performance is nothing to shout about, and the Intel software is, while visually quite easy to navigate, ultimately limiting.  There are no ‘easy’ menus, requiring the user to know the ins and outs of a motherboard in order to use it.  No OS fan controls either – those are strictly in the BIOS.  If the media sample I received for this review is indicative of a retail package, while the mouse mat addition is slightly amusing, there are no SATA cables, but an SLI connector and a Bluetooth/wifi module included.
The Intel DX79SI ‘Siler’ motherboard is expected to retail for approximately $290-$300 and comes with a 3-year limited warranty.

Visual Inspection

If we ignore the skull heatsink for a second, the Intel board actually looks fairly busy on the PCB, with almost every nook and cranny filled with a trace to some component or another.  As with all X79 products, the area consumed by the socket and memory (in this case, 8 DIMMS, 2 per channel) is just under half the board in itself.  The power delivery heatsink at the top is by itself and very simple, possibly leading to overclocking issues or throttling later on.

The main CPU fan header is at a slightly odd place, to the left of the DIMMs.  This requires the fan cable to go over the memory (hopefully your fan cable will be long enough), which could be an issue if a user decides to actively cool their memory.  The red fan headers on board actually almost follow four points of a compass, with a rear fan header by the IO, a front header by the SATA ports, and an auxiliary fan header next to the power/reset switches.

The PCH is covered by that low profile passive ‘skull’ design, which actually hides a relatively small heatsink underneath, hence the connection via heatpipe to a proper air cooled fin arrangement in the middle of the board.  To the right of this skull design are the SATA ports, all from the PCH, so two SATA 6 Gbps (blue) and four SATA 3 Gbps (black).  Users will note that there are no extra SATA controllers on board, so there are no extra SATA ports or eSATA.

Next to the power/reset buttons is a series of LEDs, indicating what part of the POST process is working.  This works in conjunction with the 2-digit debug LED also on board.  I can much use for this in case errors arrive, however there are no options in the BIOS to turn these lights off.  Depending on the case used (varying from bland to windowed) to house the system, these lights could provide an unwelcome aesthetic effect.

One of my main criticisms with the motherboard is the PCIe layout.  In order, we have a PCIe x16, x1, x16, PCI, x16 (limited to x8), x1.  The issue lies in double-width dual GPU setups, whereby the GPUs have to be placed into the x16 slots by order.  This leaves no gap between the GPUs for happy airflow – during my dual GTX580 tests on an open bench test bed, I was surprised and worried about the heat generation, which would only freak me out if it were in a case.  A lot of motherboard manufacturers in X79 should be placing the first and second PCIe slots at least an extra PCIe width apart, allowing for sufficient airflow, however Intel have gone for the ‘it works’ route here.

At various levels, the IO panel is a little disappointing.  It’s very basic, showcasing two USB 3.0, six USB 2.0, dual gigabit Ethernet (Intel NICs of course), Firewire, optical S/PDIF output and audio jacks.  The plus point here is the Back2BIOS button on the left, which when in ‘on’ mode, glows red and always boots into the BIOS.  Another click and the system will boot normally.  This would be handy for certain boards that connect the USB late in the POST sequence, making it a hassle to use the keyboard to enter the BIOS.

There is a big gap in the I/O, suggesting that Intel have skimped on perhaps some more USB 3.0 or eSATA to plug the gap.

Saturday, October 22, 2011

ASUS Zenbookan All-Aluminum CNC Chassis. (UX21) Review

Tablets have introduced a number of great features that are currently without equal in the notebook space. They are ultra light, extremely responsive, have tremendous battery life and are generally instant-on devices. Tablets however, aren't that great for being productive on, leaving good reason to still carry around a notebook. As both platforms continue to grow you'll see them learn from one another. Updates to the tablet experience in iOS 5 for example are clearly built around improving productivity. What about the notebook PC though? What is being done there to make it more tablet-like? This is where Intel's Ultrabook category of notebook PCs comes into play.

Ultrabooks today are simply ultra portable notebooks with a few requirements. They need to be thin, light, have a fast CPU (Sandy Bridge will do for now) and use some form of solid state storage. The SSD requirement helps OEMs guarantee that these Ultrabooks will have reasonable response time (application, boot and wake). Despite the tablet comparison, Ultrabooks aren't intended to go up against ARM based tablets. Intel will eventually have an Atom powered answer in that space, although we likely won't see it until Windows 8 ships.

Hardware specs alone aren't enough to bridge the tablet gap, which is why Intel views new features through software as a major part of the Ultrabook play. Intel expects Ultrabooks won't really go mainstream until sometime in late 2012-2013, so this first wave of notebooks are really nothing more than ultraportable PCs. If you look close enough, they may even look like MacBook Air clones. With the Ivy Bridge and Haswell updates, Intel is expecting to expand the impact of what Ultrabooks mean but today they are pretty much well designed notebooks with a fancy name.


That's not to say that Ultrabooks can't be impressive. In fact, impressive is probably the best way to describe ASUS' first Ultrabook: the Zenbook. Available in 11.6-inch and 13.3-inch varieties, the Zenbook focuses on user experience and aesthetics more than any previous ASUS notebook. ASUS sent us the 11-inch UX21E-DH71, but the full spec list is below:

ASUS Zenbook Lineup
UX21E-DH52 UX21E-DH71 UX31E-DH52 UX31E-DH53 UX31E-DH72
CPU i5-2467M i7-2677M i5-2557M i5-2557M i7-2677M
OS Windows 7 Home Premium 64-bit
Display 11.6-inch 1366 x 768 13.3-inch 1600 x 900
Memory 4GB DDR3
Storage 128GB 6Gbps SSD 256GB 6Gbps SSD
Wireless Connectivity 802.11 b/g/n, Bluetooth 4.0
Battery 35Whr (5+ Hours)
up to 7 day standby
50Whr (7+ Hours)
up to 10 day standby
Camera 0.3MP
Audio Bang and Olufsen ICEpower & ASUS SonicMaster Tech
I/O 1 x USB 2, 1 x USB 3, 1x audio/mic, 1x microHDMI, 1x miniVGA 1 x USB 2, 1 x USB 3, 1 x audio/mic, 1 x microHDMI, 1 x miniVGA, 1 x SD Card reader
Dimensions 11.7 x 7.7 x 0.11-0.67" 12.8 x 8.8 x 0.11-0.71"
Weight 2.43 lbs 2.86 lbs
USA MSRP $999 $1199 $1099 $1349 $1499


The Chassis

The Zenbook is built out of an all-aluminum chassis. ASUS starts with a block of aluminum and uses a CNC mill to carve out the chassis. The resulting chassis is extremely rigid and devoid of all perceivable flex. The only removable panel on the Zenbook is underneath the chassis, limiting the user's interaction with non-keyboard components that aren't built out of a single piece of metal.


The main chassis has a vertically brushed pattern on it while a circular brushing pattern is used on the display lid. the two parts of the Zenbook are also colored differently, with the main body featuring a platinum silver while the display uses a darker steel color.


In a nod to just how design focused ASUS was with the Zenbook, even the 10 screws on the bottom of the chassis feature the same brushed pattern as the rest of the chassis. ASUS elected to use torx bits instead of standard phillips heads to better match the industrial design of the system. While I appreciate the attention to detail I think I'd be happier if ASUS had stuck to standard screws.
Venting is obvious on the Zenbook, ASUS does nothing to hide it:


The effect is both elegant and functional. In using and benchmarking the system I definitely heard the fans spin up, but the chassis never got uncomfortably warm—even when looping Cinebench while typing this paragraph. Part of that is due to Intel's low voltage Sandy Bridge CPU, but part of it is because ASUS' design isn't embarassed to admit it needs air to cool the CPU.

The UX21's two speakers point downward and together produce a surprisingly decent sound. It's better than the 11-inch MacBook Air for sure.

ASUS includes a small lip on the display cover to aid in actually getting the machine open. Lifting the lid on any of these ultra slim machines isn't easy (as you're liable to lift the entire laptop instead of just the lid) but the lip does help a bit.


The display hinge is reasonably stiff. I'm able to hold the Zenbook up with the display perpendicular to the ground and not have the hinge give under the force of gravity. Picking up the Zenbook and shaking it a bit will allow the hinge to move as you'd expect, but overall it seems pretty resistent to unintended motion.

ASUS printed a pattern of very tiny hexagons on the surface of the hinge, giving the impression of perforation. On my sample one of those printed hexagons appeared slightly out of place, which in turn made it looked like my Zenbook had a clogged pore on its hinge. If you're the OCD type you better hope yours turns out perfectly.

With that minor exception I have to really commend ASUS on a job well done with the Zenbook's design. It's easily the most beautiful PC notebook I've ever laid hands (and eyes) on and even stands out more than a MacBook Air thanks to its brushed aluminum surface. Apple's design does look a bit more cohesive in my eyes, while the ASUS' Zenbook is more on the tastefully flashy side. Either way it's absolutely gorgeous and one of those things you just have to see to appreciate. I haven't been able to take a photo of the Zenbook that I believe adequately captures just how good this thing looks.


The design is quite functional as well. Thanks to the slim profile of the Zenbook and its diminutive weight, the UX21 is an absolute pleasure to carry. It's the pinnacle of portability without sacrificing the functionality of a keyboard. A tablet sure is nicer to carry, but the UX21 is much easier to type on.

The entire design is a bit more curvy than the current MacBook Air but it feels great in your hands. If you're used to Apple's aluminum the Zenbook may feel a bit tougher but the edge is something you get used to over time. After a few days of using it, the Zenbook UX21 felt just as comfortable to me as the MacBook Air.
I'm personally a fan of the 11-inch form factor as I believe, with Sandy Bridge, it delivers a great balance of portability and performance. If you do a lot of writing, it's a great companion. 

USB 3.0: Supported

The Zenbook UX21 features two USB ports: one 2.0 port driven off of the QS67 chipset and one USB 3.0 port powered by a Fresco Logic FL1009 controller. Why not feature two USB 3.0 ports? The Fresco Logic controller supports two ports but the 11-inch chassis required that one port be allocated per side. The USB 2.0 port actually resides on a daughterboard on the other side of the system from the USB 3.0 controller. It looks like there wasn't a clean way to route the traces from the FL controller to that side of the system, which is why you get 1 x USB 2.0 and 1 x 3.0 port.


The performance advantage of USB 3.0 is beyond obvious. I measured large file transfer rate across both ports and saw the following results: 149MB/s on USB 3.0, 26MB/s on USB 2.0 port.
After being stuck in a number of situations where I was forced to copy files via USB stick, I definitely appreciate systems that come with USB 3.0 support.

No Backlit Keyboard


The Zenbook unfortunately doesn't ship with a backlit keyboard. I asked ASUS why it opted not to include one, worrying that the decision was somehow price-related. It turns out it was simply a time to market issue. Designing anything this slim is difficult and ASUS needed extra time to build a keyboard lighting system that would work in the Zenbook's chassis. In the interest of getting product out the door in early Q4, ASUS abandoned the idea of doing a backlit keyboard this generation. It's quite possible we'll see one next round with Ivy Bridge.

No SD Card Reader in the 11-inch Model

Just like Apple, ASUS only includes an SD card reader in the 13-inch UX31 and not the 11-inch UX21 models. Looking inside the chassis it's plainly obvious why:


The SD card reader would have to either occupy the area of one of the USB ports, or take out a chunk of area reserved for the integrated battery. Neither sacrifice seemed to make sense to ASUS and as a result the 11 doesn't include an SD card reader.

A Slick Looking Power Brick


While I can't quite pinpoint ASUS' source of inspiration for the Zenbook UX21's 45W power brick design, the end product looks great. Cable management is handled via a standard velcro strap and the power connector itself has an LED on it that glows orange when charging or green when fully charged. Unfortunately It also glows green when it's not connected, which can cause confusion if you plug it in but don't push the connector in all the way. Is it fully charged or just not fully connected? Guessing is half the fun!

The Relocated CoA: Microsoft Approved


In our earlier coverage I pointed out that ASUS had moved Microsoft's required Certificate of Authenticity to the power brick, something that's usually located on the system itself. Microsoft mandates the sticker's placement on the system, however there is a clean PC program an OEM can apply for in order to somewhat skirt the requirement. ASUS did apply for and was approved, allowing it the luxury of moving that CoA sticker to the power adapter. While it does improve the beauty of the machine, it also means that if you lose your power adapter you do lose your CoA.


Microsoft and Intel were also petitioned to allow greyscale versions of their respective product logos. ASUS' request was also approved, which is why you see less obnoxious Intel inside and Windows 7 stickers on the Zenbook.

Intel's Rapid Start & Smart Connect Technologies: Not Supported

At Computex earlier this year Intel announced two technologies that would be featured in some Ultrabooks starting this year: Rapid Start and Smart Connect.


Rapid Start sounds a lot like hibernate to NAND, promising 6 second start times from a very low power state. You can get even quicker start times from suspend to RAM, but you sacrifice standby battery life as you have to keep refreshing data stored in DRAM while your system is asleep. Rapid Start gets around this issue by apparently storing some, but not all, data in DRAM—reducing the burden on the battery while asleep, and reducing the amount of data that needs to be read off the SSD upon wakeup.

ASUS felt that even a 6 second start time was too long and instead went after reducing STR power consumption. The result is a sub 2 second wake time (from sleep, not full off) and a ~9 day standby time on a full charge. ASUS wouldn't detail exactly how it managed to increase STR battery life, just that it spent a lot of time studying what electrical components could be shut down to save power and implements a bunch of its own tricks that its competitors haven't seemed to figure out. The Apple comparison is inevitable as the MacBook Air is rated for much longer standby time; presumably the advantage there is largely OS X related.


Intel's Smart Connect Technology is another Ultrabook feature that isn't present on the Zenbook. The idea behind this one is to have a layer of software that would periodically wake your system up while asleep and fetch all new updates (e.g. Twitter, Facebook, Emails). With Smart Connect enabled, when you actually do wake up your machine it should be far more up-to-date than it would've been normally. In order to enable Smart Connect you need Intel's WiFi solution. ASUS chose an Atheros WiFi card and as a result there's no Smart Connect here.

The ASUS Power Wizard Gadget

All Zenbooks ship with ASUS' PowerWiz Windows Gadget that gives you some battery life estimates. Based on internal ASUS test data and the current amount of battery remaining, the tool estimates how long your battery will last for various workloads. This data is all static in the sense that it is based on predetermined values and not your current workload.


The standby battery life estimate however is a bit more accurate. Every time you put your Zenbook to sleep, ASUS monitors power usage for a full minute. Based on that power usage it then determines standby time given remaining battery capacity. Since standby power depends in part on what you have in memory, this method of estimation can significantly improve accuracy. Granted you'll always get a trailing estimate (e.g. this is how long your battery would last in stand by if you're doing exactly what you did last time you put it to sleep) but it's better than nothing I suppose.

Sunday, October 9, 2011

ASUS Eee Pad Slider Regardless of OS Review

I understand the appeal of tablets. Regardless of OS, they all provide a far more intimate experience when browsing the web and reading emails. I genuinely prefer doing both of those things on a tablet than on a notebook or desktop. Then there are the apps. Photos, maps, ebooks, videos and even IP cameras are comfortably accessible from tablets. Obviously you can do the same on a notebook or desktop, the tablet form factor combined with a responsive touch UI simply means you can do these things in a more relaxed position.

What has always frustrated me with tablets however is what happens when you have to give any of these apps a significant amount of input. While the virtual keyboards on tablets are pretty mature, the form factor doesn't allow for quick typing like on a smartphone. A smartphone is easily cradled in both of your hands while your thumbs peck away at the keyboard. A tablet however needs to be propped up against something while you treat it like a keyboard. Put it on your lap and you have to hunch over the thing because the screen and input surface are on the same plane (unlike a notebook where the two are perpendicular to one another). Try to type in a reclined position on a couch and you end up lying awkwardly with your thighs and thumbs supporting the tablet. Ever see the iPad billboards and note the really awkward leg placement in them?
The excuse for the tablet has always been that it's a consumption device, not one for productivity. But what if I want to browse the web and respond to long emails? Must I keep switching between a tablet and a notebook, between consumption and productivity device? That has always seemed silly to me. In striving for comfort and efficiency it seems that having to constantly switch between two large devices would be both uncomfortable and inefficient. After all, who browses all of the web then switches to only writing emails without intermixing the two. Perhaps these discrete usage models are somewhat encouraged by the lack of true multitasking (rather than task switching) of modern tablet OSes, but eventually things must change.


Windows 8 alone will bring change as it finally addresses the issue of having two things on your screen at once. On today's tablets, for the most part, once you're in an application that's all you get to interact with. One of the biggest issues I have is it's virtually impossible to carry on an IM conversation on a tablet while doing anything else. Without constantly (and frustratingly) switching between apps, it's impossible to have a conversation and browse the web for example.

What about on the hardware side of things? Bluetooth keyboards and keyboard docks have existed since they very first of this new generation of tablets hit the market. These accessories have all been very functional but they do tend to hinder the portability of tablets. With its Eee Pad Transformer, ASUS addressed the issue by offering a keyboard dock that would turn the tablet into an Android netbook while extending its battery life. The end result was an extremely flexible device, but it still required that you either carry around a significantly bulkier tablet or made a conscious decision to take one or both pieces of the setup (tablet + dock).

Continuing down this road of experimenting with transformable tablets, ASUS' next attempt to bring the best of both tablet and netbook worlds comes in the form of the Eee Pad Slider.


Eee Pad Transformer + Dock (left) vs. Eee Pad Slider (right)
The Slider takes the same basic Eee Pad tablet from the Transformer and integrates a slim, sliding keyboard. You only get a single battery (25 Wh) but you get a much thinner and lighter form factor than the Transformer with its dock.
2011 Tablet Comparison
  ASUS Eee Pad Transformer ASUS Eee Pad Transformer + Dock ASUS Eee Pad Slider Samsung Galaxy Tab 10.1
SoC NVIDIA Tegra 2 (Dual ARM Cortex A9 @ 1GHz) NVIDIA Tegra 2 (Dual ARM Cortex A9 @ 1GHz) NVIDIA Tegra 2 (Dual ARM Cortex A9 @ 1GHz) NVIDIA Tegra 2 (Dual ARM Cortex A9 @ 1GHz)
GPU NVIDIA GeForce NVIDIA GeForce NVIDIA GeForce NVIDIA GeForce
RAM 1GB 1GB 1GB 1GB
Display 1280 x 800 IPS 1280 x 800 IPS 1280 x 800 IPS 1280 x 800 PLS
NAND 16GB 16GB 16GB 16GB
Dimensions 271 x 175 x 12.95mm 271 x 183 x 16 - 28mm 273 x 180.3 x 17.3 - 18.3mm 256.6 x 172.9 x 8.6mm
Weight 695g 1325g 960g 565g
Price $399 $550 $479 $499

The price isn't as attractive as the base Eee Pad Transformer. At $479 for the 16GB WiFi version you're now well into Galaxy Tab/iPad 2 territory, but you do get a built-in keyboard. Samsung's keyboard for the Galaxy Tab is priced at $50 while Apple's Bluetooth keyboard for the iPad 2 (and Macs) will set you back $70. When viewed this way, the Slider is still a steal but if the recent TouchPad sale and Kindle Fire release taught us anything it's that there's a huge market for non-Apple tablets, just not at $500. ASUS was on the right track by pricing the Eee Pad Transformer at $399, but the Slider at $479 takes a step in the wrong direction.

The Display & Hardware

The Slider starts out very similarly to the Transformer. You get a 10.1-inch IPS panel with a Honeycomb-standard 1280 x 800 display (1920 x 1200 will be what the next-gen of Android tablets will sport). The display is near-identical to what ASUS used in the transformer. Max brightness ends up at an iPad 2-like 378 nits, while overall contrast ratio appears to have improved a bit thanks to deeper blacks in our review unit's panel.

Display Brightness
Display Brightness
Display Contrast

ASUS does need to start calibrating these panels at the factory though. The Slider's white point is set to 7700K.

Viewing angles are all great, the only issue with the Slider's display is the large gap between the outermost glass and the LCD panel itself. We complained about this in our Eee Pad Transformer review as well, but by not tightly integrating the LCD and capacitive touch layers you end up with a gap in the display construction that can cause annoying reflections. The additional glare is a problem in any case where there's a direct light shining on the screen. Most of these tablets aren't good outdoors in direct sunlight to begin with, but this issue does make the Slider a bit more annoying to use compared to the iPad 2 or Galaxy Tab 10.1 for example.
All of the outward facing materials are either glass or soft touch plastic, a subtle but noticeable improvement over the Transformer. The smell of the soft touch plastic is distinct but not all that pleasant. Here's hoping it fades quickly. The durability of the soft touch coating is also a concern. My review unit developed a couple of scratches and I honestly didn't use it any differently than the other tablets I've reviewed, nor did I handle it particularly roughly.


ASUS was smart enough to include five rubber feet on the back of the Slider. With the keyboard deployed the Slider's back serves as its stand, so the feet are necessary to keep your Eee Pad pristine. The overall design is clearly ASUS' own creation, but I wouldn't call it particularly memorable. What matters the most is that it's functional and there can be no question of that.

The perimeter of the Slider is ports-a-plenty. On the right edge of the tablet is a full sized USB 2.0 port and headphone jack. On the left there's a microSD slot and along the top there's ASUS' dock connector and mini HDMI out (type C connector). Charging is handled via the same USB adapter that shipped with the Eee Pad Transformer.


Power, reset and volume up/down are also located on the left side of the tablet. Yes, that's right, there's an actual reset button on the Eee Pad Slider. The button is recessed as to avoid any accidental activation. A single click of it will reset the Slider, no questions asked.


I'm actually very happy there is a reset button the tablet. As these devices become even more PC-like expect them to encounter the same sort of stability issues any hardware running complex software has to deal with.
The Slider has two cameras: a 5MP rear facing module and 1MP front facing unit. There's a subtle, smartphone-sized bulge around the rear camera module. The bulge is noticeable but it doesn't clear the height of the rubber feet so you don't have to worry about resting your tablet on the rear camera.
The Slider is significantly heavier than the stock Eee Pad (without dock) for obvious reasons. And compared to the Samsung Galaxy Tab, well, there's just no comparison there. That being said, the Slider is still much nicer to carry around that the Eee Pad + dock (it's far less bulky) and it's more convenient than most notebooks in this price range. You really do get the full tablet experience with much of the notebook experience thanks to the integrated keyboard.

Introducing the Alienware M18x and NVIDIA GeForce GTX 580M

Historically, whenever NVIDIA or AMD launched a new mobile powerhouse GPU, AVADirect has been on hand with a high-end Clevo notebook ready to put its best foot forward. Yet lately NVIDIA and AMD have been playing such a rapid game of oneupsmanship at the top of the chain that it seemed silly to bring the Clevo X7200 back in again, and we wanted to see if we could find the high end hardware elsewhere.

Thankfully our needs happened to coincide with Alienware's, and our rep was able to pull some strings and get us two M18x units back-to-back. Today we present to you the first of a two-part series where we can first examine NVIDIA's GeForce GTX 580M (both as a single GPU and in SLI) as well as Alienware's M18x proper, with a second part focusing both on the AMD Radeon HD 6990M (again as a single GPU or in CrossFire) and a face-off between these two top-of-the-line mobile graphics solutions.


What we really have on the slab today are two different pieces of hardware (four, actually, if you count our special bonus contestant...more on those in a bit.) First, we're finally rounding out our coverage of Alienware's current lineup with the biggest one of them all, the monstrous M18x. Alienware's M17x R3 is a little bit more svelte than its predecessor, and that's due to Alienware deciding to shift the dual-GPU solutions into this new, bigger model. At first glance it looks basically identical to the other Alienware units we've reviewed recently, but there's a little more to it.

The second piece of hardware we're checking out is the recently refreshed NVIDIA GeForce GTX 580M. The 580M is basically the GF114-based refresh of the GTX 485M, finally rounding out NVIDIA's mobile 500 series. With it comes two upgrades, one major and one minor: a clockspeed bump (minor) and support for Optimus (major.) Unfortunately with the SLI configuration, Optimus goes by the wayside and Alienware opts for using mux-based switchable graphics in the M18x to keep battery life up.

Yet NVIDIA's awfully proud of Optimus. So proud, in fact, that they gave us access to a GTX 580M-based Alienware M17x R3 for battery life testing. We'll be including those results on the battery life page, but suffice it to say, they're impressive. That's our third piece.

Finally, the last piece is a true rarity: both of our Alienware M18x systems come equipped with an Intel Core i7-2920XM. Alienware includes three different BIOS settings for the overclock (though you can also tune it yourself) and we went with the highest one for our testing, the one they dub "Level 3." After all, if you're going to buy a thousand dollar, overclockable mobile processor, what sense is there in just running it at stock, especially when the vendor makes it that easy to get more juice out of it? Here's the full rundown of the M18x review hardware.

Alienware M18x Notebook Specifications
Processor Intel Core i7-2920XM
(4x2.5GHz + HTT, 3.5GHz Turbo, 32nm, 8MB L3, 55W)
(Overclocked to 3.5GHz, 4.2GHz Turbo)
Chipset Intel HM67
Memory 4x4GB Hynix DDR3-1600 (Max 4x8GB)
Graphics NVIDIA GeForce GTX 580M 2GB GDDR5 in SLI
(2x384 CUDA cores, 620MHz/1240MHz/3GHz core/shader/memory clocks, 256-bit memory bus)
Display 18.4" LED Glossy 16:9 1080p
SEC5448
Hard Drive(s) 2x Seagate Momentus 750GB 7200-RPM HDD
Optical Drive Slot-loading Blu-ray/DVDRW Combo (HL-DT-ST CA30N)
Networking Atheros AR8151 PCIe Gigabit Ethernet
Intel Centrino Ultimate-N 6300 802.11a/b/g/n
Bluetooth 3.0
Audio IDT 92HD73C1 HD Audio
Stereo speakers with subwoofer
S/PDIF, mic, and two headphone jacks
Battery 12-Cell, 11.1V, 97Wh
Front Side N/A (Speaker grilles)
Right Side ExpressCard/54
Slot-loading optical drive
MMC/SD/MS Flash reader
2x USB 2.0
eSATA/USB 2.0 combo port
HDMI input
Left Side Kensington lock
Ethernet port
VGA
HDMI
Mini-DisplayPort
2x USB 3.0
S/PDIF, mic, and two headphone jacks
Back Side AC jack
4x exhaust vents
Operating System Windows 7 Home Premium 64-bit
Dimensions 17.17" x 12.68" x 2.13" (WxDxH)
Weight ~11.93 lbs
Extras 3MP Webcam
Backlit keyboard with 10-key and configurable shortcut keys
Flash reader (MMC, SD/Mini SD, MS/Duo/Pro/Pro Duo)
Configurable lighting
Warranty 1-year standard warranty
2-year, 3-year, and 4-year extended warranties available
Pricing Starting at $1,999
Price as configured: $4,924

Starting at the top we have one of the two parts of the review system that you can't get anymore: the Intel Core i7-2920XM. At stock, the i7-2920XM is a quad-core, Hyper-Threaded processor running at 2.5GHz nominal clocks with 8MB of L3 cache and capable of turbo'ing up to 3.5GHz on one core (3.2GHz on all four). Yet when you hit "Level 3" in the BIOS, suddenly it's screaming up to 3.5GHz on all four cores nominally and hitting 4.2GHz on a single, effectively making it faster than Intel's top of the line i7-2600K is at stock...on the desktop. Yeowch.

So why can't you get it anymore? Between the time when Alienware was seeding review units to the press and now, Intel gave the mobile i7 quad-cores a minor speed bump, and now you can only buy the upgraded chips...at the same prices as their predecessors. If you order an M18x with the i7-2960XM, you'll get a 200MHz bump in clocks at every step: it starts at 2.7GHz and turbos up to 3.7GHz on a single core (or runs at 3.4GHz on all four...like an i7-2600K.) There's a reason these top end chips are $900 upgrades, and it's a testament to Intel's Sandy Bridge architecture that you can get this kind of performance in a portable form factor.

Backing up the i7-2920XM in our review unit is 16GB of DDR3-1600, spread out across four 4GB SODIMMs, along with Intel's HM67 mobile chipset. Alienware also inexplicably includes two 750GB 7200-RPM Seagate Momentus hard drives, and in this review unit, they're not configured in RAID 0. Try and configure your own M18x and you'll run into the same nonsensical issue I had when I reviewed the M17x: Alienware offers these notebooks with two drive bays, but not a single SSD data + HDD storage configuration available. For the life of me I can't fathom why this is the case, and that's ignoring their usual fixation on RAID 0.

Of course the crown jewel of our review unit is the pair of NVIDIA GeForce GTX 580Ms in SLI. Outside of the support for Optimus (which isn't available here due to the SLI configuration), the GTX 580M is an incremental upgrade on the 485M: it jumps from the GF104 to the GF114, and with the slightly tinkered chip design scores an extra 45MHz on the GPU (with a corresponding 90MHz jump to the CUDA cores) while retaining the same effective 3GHz clock on the 2GB of GDDR5. I've found in testing the 580M that performance is roughly on par with a desktop GeForce GTX 560, making it more than capable of doing 1080p gaming on its own. In fact, the only game I've seen really put the screws to it (besides the poorly optimized Metro 2033) is Crysis 2 with the DX11 pack.

Qualcomm's Snapdragon S4: MSM8960 & Krait Architecture Explored

Let's recap the current smartphone/tablet SoC landscape. Everything shipping today is built on a 4x-nm process, built either at Global Foundries, Samsung, TSMC or UMC. Next year we'll see a move to 28nm (bringing better performance and power characteristics) but between now and the end of 2012 there will be a myriad of designs available on the market.

The table below encapsulates much of what you can expect over the next 12 months:

2011/2012 SoC Comparison
SoC Process Node CPU GPU Memory Bus Release
Apple A5 45nm 2 x ARM Cortex A9 w/ MPE @ 1GHz PowerVR SGX 543MP2 2 x 32-bit LPDDR2 Now
NVIDIA Tegra 2 40nm 2 x ARM Cortex A9 @ 1GHz GeForce 1 x 32-bit LPDDR2 Now
NVIDIA Tegra 3/Kal-El 40nm 4 x ARM Cortex A9 w/ MPE @ ~1.3GHz GeForce++ 1 x 32-bit LPDDR2 Q4 2011
Samsung Exynos 4210 45nm 2 x ARM Cortex A9 w/ MPE @ 1.2GHz ARM Mali-400 MP4 2 x 32-bit LPDDR2 Now
Samsung Exynos 4212 32nm 2 x ARM Cortex A9 w/ MPE @ 1.5GHz ARM Mali-400 MP4 2 x 32-bit LPDDR2 2012
TI OMAP 4430 45nm 2 x ARM Cortex A9 w/ MPE @ 1.2GHz PowerVR SGX 540 2 x 32-bit LPDDR2 Now
TI OMAP 4460 45nm 2 x ARM Cortex A9 w/ MPE @ 1.5GHz PowerVR SGX 540 2 x 32-bit LPDDR2 Q4 11 - 1H 12
TI OMAP 4470 45nm 2 x ARM Cortex A9 w/ MPE @ 1.8GHz PowerVR SGX 544 2 x 32-bit LPDDR2 1H 2012
TI OMAP 5 28nm 2 x ARM Cortex A15 @ 2GHz PowerVR SGX 544MPx 2 x 32-bit LPDDR2 2H 2012
Qualcomm MSM8x60 45nm 2 x Scorpion @ 1.5GHz Adreno 220 2 x 32-bit LPDDR2* Now
Qualcomm MSM8960 28nm 2 x Krait @ 1.5GHz Adreno 225 2 x 32-bit LPDDR2 1H 2012

The key is this: other than TI's OMAP 5 in the second half of 2012 and Qualcomm's Krait, no one else has announced plans to release a new microarchitecture in the near term. Furthermore, if we only look at the first half of next year, Qualcomm is the only company that's focused on significantly improving per-core performance through a new architecture. Everyone else is either scaling up in core count (NVIDIA) or clock speeds. As we've seen in the PC industry however, generational performance gaps are hard to overcome - even with more cores or frequency.

Qualcomm has an ARM architecture license enabling it to build its own custom micro architectures that implement the ARM instruction set. This is similar to how AMD has an x86 license but designs its own chips rather than just producing clones of Intel processors. Qualcomm remains the only active player in the smartphone/tablet space that uses its architecture license to put out custom designs. The benefit to a custom design is typically better power and performance characteristics compared to the more easily synthesizable designs you get directly from ARM. The downside is development time and costs go up tremendously.
Scorpion was Qualcomm's first Snapdragon CPU architecture. At a high level, it looked very much like an optimized ARM Cortex A8 design although the two had nothing in common outside of instruction set. Scorpion was a dual-issue, in-order architecture that eventually scaled to dual-core and 1.5GHz variants.
Scorpion was pretty much the CPU architecture of choice in the 2009 - 2010 timeframe. Throughout 2011 however, Qualcomm has been very quiet as dual Cortex A9 designs from NVIDIA, Samsung and TI have surpassed it in terms of performance.

Going into 2012, Qualcomm is set for a return to glory as it will be the first to deliver a brand new microprocessor architecture and the first to ship 28nm SoCs in volume. Qualcomm's next-generation SoCs will also be the first to integrate an LTE modem on-die, which should enable LTE on nearly all high-end devices at much better power levels than current multi-chip 4x-nm solutions. Today we're able to talk a bit about the architecture details and performance expectations of Qualcomm's next-generation SoC due out in the first half of 2012.

Krait Architecture


The Krait processor is the heart of Qualcomm's second generation Snapdragon and it's the core of all Snapdragon S4 SoCs. Krait takes the aging base of Scorpion and gives it a much needed dose of adrenaline.
Krait's front end is significantly wider. The architecture can fetch and decode three instructions per clock. The decoders are equally capable of decoding any ARMv7-A instructions. The wider front end is a significant improvement over the 2-wide Scorpion core. It alone will be responsible for a tangible increase in IPC.

Architecture Comparison
  ARM11 ARM Cortex A8 ARM Cortex A9 Qualcomm Scorpion Qualcomm Krait
Decode single-issue 2-wide 2-wide 2-wide 3-wide
Pipeline Depth 8 stages 13 stages 8 stages 10 stages 11 stages
Out of Order Execution N N Y Partial Y
FPU VFP11 (pipelined) VFPv3 (not-pipelined) Optional VFPv3-D16 (pipelined) VFPv3 (pipelined) VFPv3 (pipelined)
NEON N/A Y (64-bit wide) Optional MPE (64-bit wide) Y (128-bit wide) Y (128-bit wide)
Process Technology 90nm 65nm/45nm 40nm 40nm 28nm
Typical Clock Speeds 412MHz 600MHz/1GHz 1.2GHz 1GHz 1.5GHz
The execution back-end receives a similar expansion. Whereas the original Scorpion core only had three ports to its execution units, Krait increases that to seven. Krait can issue up to four instructions in parallel. The additional execution ports simply help prevent any artificial constraints on ILP. This is another area where Krait will be able to see significant IPC gains.

Krait's fetch and decode stages are obviously in-order, but the back-end is entirely out-of-order. Qualcomm claims that any instruction can be executed out of order, assuming that doing so doesn't create any new hazards. Instructions are retired in order.


Qualcomm lengthened Krait's integer pipeline slightly from 10 stages in Scorpion to 11 stages in Krait. Load/store operations tack on another two cycles and instructions that go through the Neon/VFP path further lengthen the pipe. ARM's Cortex A15 design by comparison features a 15-stage integer pipeline.

Qualcomm's design does contain more custom logic than ARM's stock A15, which has typically given it a clock speed advantage. The A15's deeper pipeline should give it a clock speed advantage as well. Whether the two effectively cancel each other out remains to be seen.

Qualcomm Architecture Comparison
  Scorpion Krait
Pipeline Depth 10 stages 11 stages
Decode 2-wide 3-wide
Issue Width 3-wide? 4-wide
Execution Ports 3 7
L2 Cache (dual-core) 512KB 1MB
Core Configurations 1, 2 1, 2, 4

Krait has been upgraded to support the new virtualization instructions added in Cortex A15. Also like the A15, Krait enables LPAE for 40-bit memory addressing.

At a high-level Qualcomm has built a 3-wide, out-of-order engine that feels very much like a modern version of Intel's old P6. Whereas designs from the A8 generation looked like modern Pentiums, Krait takes us into the era of the Pentium II.

Note that courtesy of the wider front-end and OoO execution engine, Krait should be a higher performance architecture than Intel's Atom. That's right, you'll be able to get better performance than some of the very first Centrino notebooks in your smartphones come 2012.

Performance Expectations

Performance of ARM cores has always been characterized by DMIPS (Dhrystone Millions of Instructions per Second). An extremely old integer benchmark, Dhrystone was popular in the PC market when I was growing up but was abandoned long ago in favor of more representative benchmarks. You can get a general idea of performance improvements across similar architectures assuming there are no funny compiler tricks at play. The comparison of single-core DMIPS/MHz is below:

ARM DMIPS/MHz
  ARM11 ARM Cortex A8 ARM Cortex A9 Qualcomm Scorpion Qualcomm Krait
DMIPS/MHz 1.25 2.0 2.5 2.1 3.3

At 3.3, Krait should be around 30% faster than a Cortex A9 running at the same frequency. At launch Krait will run 25% faster than most A9s on the market today, a gap that will only grow as Qualcomm introduces subsequent versions of the core. It's not unreasonable to expect a 30 - 50% gain in performance over existing smartphone designs. ARM hasn't published DMIPS/MHz numbers for the Cortex A15, although rumors place its performance around 3.5 DMIPS/MHz.

Updated VeNum Unit

ARM's NEON instruction set is handled by a dedicated unit in all of its designs. Krait is no different. Qualcomm calls its NEON engine VeNum and has increased its issue capabilities by 50%. Whereas Scorpion could only issue two NEON instructions in parallel, Krait can do three.
Qualcomm's NEON data paths are still 128-bits wide.

Friday, September 23, 2011

Zotac Z68ITX-A-E Wifi Review - Mini-ITX meets Z68

With every chipset, there's a call to arms in providing the package that everyone needs. Unfortunately there's never one motherboard which can cater for every possibility, but there are some that come quite close. Our review today is on the Zotac Z68ITX-A-E Wifi - a mini-ITX take on the Z68 chipset, which promises to be a winner right from the start, with dual gigabit Ethernet, USB 3.0, onboard wifi, onboard power/reset buttons, a debug LED, a lot of extras with your motherboard, and all the extras that Z68 offers. For $170, we're looking at a good contender for an award here, as long as the performance and additions compare well to its rivals.

 
Overview

The most noticeable thing about using the Zotac board for this review is the out-of-spec features used by Zotac. With regards to the turbo of the CPU, the CPU should scale down the multiplier bins the more cores being used - however, the Zotac board likes to apply a 4x multiplier increase, even in full CPU usage. This gives it a distinct advantage in all our stock benchmark suite, and an unfair advantage against every other board in the market. It gives the consumer, however, extra performance without having to do anything. This may set an unhealthy trend, where other manufacturers will similarly produce products out-of-spec in order to jump ahead in performance.

Overall, for $170, Zotac have provided a board full of features that provide a great motherboard for various consumer levels. The addition of dual gigabit Ethernet, onboard wifi, dual HDMI, and that out-of-spec CPU speed are nice additions to such a small product. This situation benefits a non-K Sandy Bridge CPU (which unfortunately negates one of the Z68 features, overclocking, which as we find out isn't that great on the Zotac) where the iGPU is required as well as the PCIe x16 slot. There's not too many SATA ports (two SATA 6 Gbps, two SATA 3 Gbps), which perhaps is ideal for the non-enthusiast consumer (SSD, HDD, DVD/BluRay drive). Also, the lack of overclocking may be a sticking issue for some. I'm unsure if I should label it a gamers' board, a 24/7 machine with various enthusiast applications that require performance, or a multi-monitor setup that needs Sandy Bridge and Z68 and perhaps a GPU for GPU programming. Nevertheless, I've found the board an impressive product at a great price, despite the old fashioned BIOS and lack of software provided.
 
Visual Inspection


With Zotac's aim of piling as much as it can onto such a small PCB, it is obvious to see that the board is fairly cramped, in a livery with no defined color (yellow, orange, red, blue, black). As a result, the 8-pin 12V CPU power connector is on the far end of the board behind the audio headers of the I/O panel. The CPU socket is also quite small in comparison to full size P67/Z68 boards we've seen this year, negating large CPU coolers but still providing enough space for stock coolers and all-in-one CPU coolers such as the Corsair H50 and H100.

There are two fan headers on board - one by the SATA ports and the other beside the 24-pin ATX power connector. Beside this power connector are the power/reset buttons and a debug LED - it's great to have this on such a small board. The wifi module is in a mini-PCIe (with mSATA compatibility) between the memory slots and the SATA ports - with cables from the wifi card to the I/O panel. A full size mSATA holder is included in the bundle, if the user decides not to use the wifi and takes advantage of the Z68 Smart Caching Technology via this port.


On board are four SATA ports - two SATA 6 Gbps and two SATA 3 Gbps, all from the PCH. Technically the PCH should be able to support two more, but given the size of the board and all the other extras on it, it's understandable that these are not included. Beside the SATA ports are two USB 2.0 headers, and beside them, behind the wifi antenna, is a USB 3.0 header.


The back panel of the board is also similarly cramped, with a combination of wifi antenna, dual gigabit Ethernet, two USB 3.0, four USB 2.0, a clear CMOS button, a PS/2 Connector, dual HDMI and mini-DisplayPort, optical SPDIF output, and the standard audio jacks. The combination of having the heatsink there results in some space lost - perhaps if it wasn't there by design, the HDMI and mini-DP could be stacked and other features could be added.

The Apple Thunderbolt Display Review

Ever since I moved to a notebook as my main work computer I've become increasingly annoyed with the process of actually moving my notebook-as-a-desktop around. At my desk I've got DisplayPort, Ethernet, two USB, FireWire 800, speakers and power all plugged into a 15-inch MacBook Pro. What makes it frustrating isn't the first-world-problem of having to unplug seven cables, rather that it doesn't need to be seven cables - Apple could make the whole thing happen with just two.

Every Mac released in 2011 has at least one Thunderbolt port (the iMac has two), and Thunderbolt can deliver exactly what I'm looking for. Thunderbolt can carry two things: PCI Express and DisplayPort, the former for data and the latter obviously for video. Why would you want to carry PCIe and DP over a single cable? To address problems like the one above.


Pretty much all device expansion on modern day PCs happens via PCI Express. Several years ago it was hard to find PCIe sound cards or Ethernet controllers, but these days vanilla PCI slots are nearing extinction and PCIe is the de facto standard. Ethernet, USB and FireWire controllers all exist as single-lane PCIe devices. Put a bunch of them at the other end of a Thunderbolt cable and you no longer need to plug in a bunch of individual cables into your notebook when at your desk. Send DisplayPort over the same cable and you can actually move all of those ports onto your monitor, thereby using a single cable to carry everything but power to your display. And this is exactly what Apple has done with its new Thunderbolt Display. By mating its 27-inch LED Cinema Display with a bunch of integrated IO controllers, Apple is hoping to deliver a display that's more of a mobile docking station than just a passive way to display video.


Apple has tried this in the past. The old Cinema Displays used to feature an Apple Display Connector (ADC) that actually carried DVI, USB and power from a desktop Mac to the monitor. You only needed to plug in a single cable to your display, significantly reducing desktop clutter. Although Thunderbolt does carry power, it's limited to 10W - not enough to power any reasonably sized display. Where Thunderbolt does win out over ADC however is in its universal appeal. Intel created the standard. Although it's used almost exclusively on Apple systems today, come 2012 Intel is expecting PC OEMs to embrace the interface with its Cactus Ridge line of Thunderbolt controllers.

Apple's Thunderbolt Display

The Thunderbolt Display uses a near, if not perfectly, identical panel to what was in last year's 27-inch LED Cinema Display. You get a 27-inch, 16:9, 2560 x 1440 LED backlit display capable of at least 350 nits at full brightness. Apple seems to conservatively spec its desktop displays as we were able to measure 425 nits at max brightness. The uber brightness comes in handy because the display does have a glossy finish. Indoors it's not really a problem unless you're watching a dark movie scene with the display lit by a sun-facing window. Even then, cranking up the brightness all the way is usually enough to overcome any significant glare. As with all glossy displays, if you have light control (e.g. curtains or blinds) you'll be just fine.


The display sits on an aluminum swivel base that allows for -5 degrees to 25 degrees of tilt along the horizontal axis. There's no height adjustment for the display either, only tilt. Personally, I use a height adjustable desk as I find it helps me avoid any carpal tunnel pain. Combined with a height adjustable chair, the lack of height adjustment on the display doesn't bother me. If you have a fixed height desk however, this may be a problem.

Aesthetically the Thunderbolt Display continues Apple's aluminum meets glass design language. The front of the display is all glass, while the edges and back are all aluminum. Along the top surface of the display is a mic for the integrated FaceTime HD camera. The outgoing 27-inch LED Cinema Display (still available for purchase online) sported a 640 x 480 camera, while the Thunderbolt Display ups capture resolution to 1280 x 720.
There's an ambient light sensor hidden in the top bezel of the display, but as always you can disable its functionality from within OS X.


There are two integrated speakers in the display, again unchanged from the previous LED Cinema Display.
Two cables attach directly to the display: a removable power cable and an integrated IO cable. Cable management is done through a round cutout in the aluminum stand. The IO cable is where things really change with the Thunderbolt Display. Instead of a breakout of three cables as was the case with the Cinema Display, there are now only two: MagSafe and Thunderbolt.


The MagSafe connector remains unchanged. If you've got any Mac that can be charged by an 85W MagSafe adapter, the Thunderbolt Display will charge said Mac. This feature alone is particularly awesome for notebook-as-a-desktop users since it allows you to just keep your actual AC adapter tucked away in your travel bag. For me I keep my MagSafe adapter in my bag and never take it out so I never have to worry about forgetting to pack it. Given how expensive MagSafe adapters are ($79 for an 85W), this is a nice feature for MacBook Air/Pro owners.

The Thunderbolt cable is obviously what gives this new display its name. Inside the Thunderbolt Display is an Intel Eagle Ridge Thunderbolt controller. The type of controller is important as it bestows upon the display some clear limitations. The biggest of course is the lack of support for all non-Thunderbolt systems. That's right, the only way to get video to the Thunderbolt Display is by using a Thunderbolt enabled Mac (or theoretically a Thunderbolt enabled PC). For Mac users that means only 2011 MacBook Pro, Air, iMac or Mac mini models will work with the Thunderbolt Display. Everyone else has to either buy a new Mac or stick with older displays.


I believe the limitation here is actually on the cable side. A Thunderbolt cable can only transmit a Thunderbolt signal. Although DisplayPort is muxed in, if the display on the other end is expecting Thunderbolt and it receives DisplayPort it won't know what to do with it. It's possible Apple could have built in logic to autosense and switch between Thunderbolt and DisplayPort as inputs, but Apple traditionally employs clean breaks rather than long technology transitions. If Apple wants to ensure Thunderbolt gets adopted (at least by its users), this is the way to do it. As we learned from other legacy interfaces (e.g. PS/2, IDE), if you enable backwards compatibility you'll ensure the survival of systems that implement those interfaces. It's not so great for existing customers unfortunately.

Related Posts Plugin for WordPress, Blogger...
Powered by Blogger.